Showing posts with label tutorial. Show all posts

Wednesday, October 10, 2012

Quilled earring tutorial


       I was recently requested for a quilled earring tutorial from Vandana of Craftsia blog. This is a simple design made entirely out of tight coils. The colours used are silver and pink colour strips.

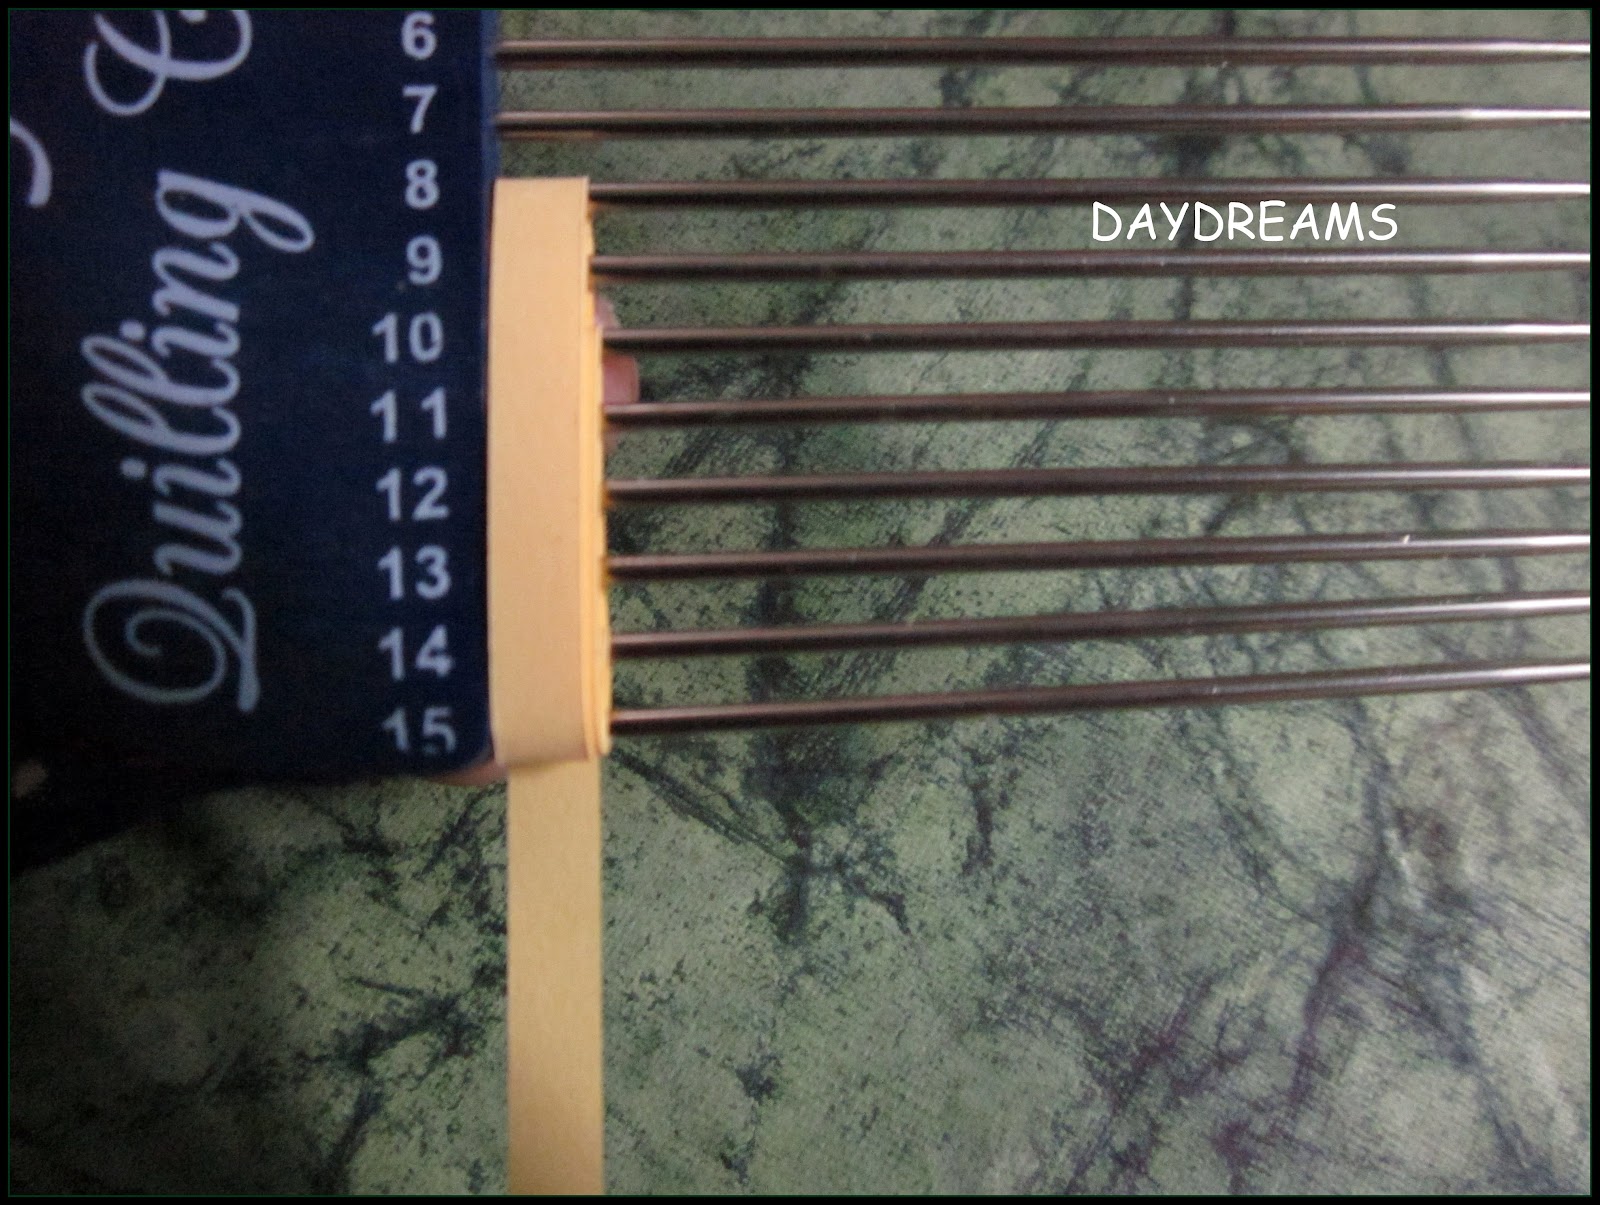
      Take one silver(or any colour) strip and roll it around a pen or your tool to make a tight ring coil.


       Pinch the ring coil on one side to make a tear drop shape , Repeat this step seven times. 


       Make a tight coil out of one silver strip ,first roll the strip with a needle or slotted tool and stick the end.


      After these steps you will have seven tear drops and one tight coil


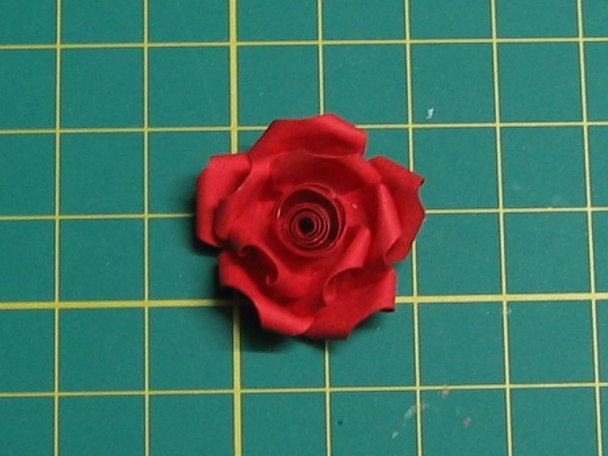
      Stick all the elements together preferably on a plastic surface so that the flower can be lifted off the surface easily after drying.


      Make tight coils with the pink colour strips ( I used half a strip for each tight coil).Then stick them together to make a flower .

       Stick this pink flower on top of the silver flower. I also added a small punched circle to the back of the
earring to cover all the joints of the silver colour flower and to make the earring more sturdy


      Repeat the entire process to make another to complete the pair . I added glue to the wrong side of the earrings to strengthen it .

     I am working on a lot of cards but can't post until the end of this month. I am also trying to do my bit for our library's Navarathri Golu.

     Thanks for stopping by , have a great day.
For more of my quilled jewellery , do visit my page. .


Sunday, November 27, 2011

Quilled flowers in a pot


      I wanted a quilling comb for a long time ,to help me make perfect wheat ears and to make this flower.
The colour I choose was the one I have not used much(a little different in real) , I hand cut the strips and used the quilling comb for the petals and a fringed flower for the center.
     The flowers kind of popped out when placed against this background. The background is a hand made paper from my favourite pack. I hoard handmade paper and admire them and it is with some difficulty that I cut them up for a project.
     It took me a lot of time to figure out how to arrange the flowers as most colours did not show on this background or looked too bright.So I used the same colour paper for the pot, which is hand cut with a pair of scissors (I stuck quilled elements underneath to give it dimension). I must say I had a lot of input from my kids .


Stick the first loop around the first needle.


Loop around the needles .


Once you reach the required number on the comb, cut up the strip and stick the end.

Remove from the comb.


       A very simple tag ,using my scraps for priya's challenge. Glad I remembered on time.


     Thanks for stopping by, Have a wonderful day.

Monday, October 3, 2011

Multi-strip scrolls.


     Tips for multi-strip scrolls were recently shared on facebook and I am so charmed by its elegance .I have seen so much of these scrolls on Neli's blog , that this piece is much inspired by her work. I had different coloured strips left out from other projects in a box and I tried to use as many colours as possibe. I am entering this card for the first anniversary challenge by Piyu at take a quill pill. All the strips are hand cut from A4 colour sheets.


 For those who missed this on facebook here is the picture . (click on the image to view).


      I also have such wonderful news to share. I won Ann martin's fabulous giveaway . I won a beautiful glass paper weight kit, which has space to house quilled work!!. I have been smiling all week:)).


    I have some more news too, I just now found out that I  have also won the challenge for last month at the Emirates quilling guild on facebook.The topic was leaves and I had entered my Peepal leaf Ganesh. I would like to thank everyone who voted for me. The prize is a goodie bag from Meg crawford another super quiller from Australia:)).


    Thanks for stopping by, Have a wonderful day.

Sunday, May 22, 2011

crepe paper rosettes


        I have never used such brilliant colours on my card!  Kavitha is having a long celebration on her blog and I wanted to take a little part in it. For this card my starting point was a card of Kavi which she had sent me with her candy.I link this card to her Inspirational challenge .
     The brilliant colours I have used is inspired by ICR colour challenge I love bright colours and really enjoyed putting to use some of the stuff I never thought I would use. The back ground paper is from a hand made paper pack I got from Bangalore -a very bright yellow.The crepe paper rosettes are handmade and there is also a quilled flower.I have also used quilled letterings "Be Happy" with dark blue quilling strips, hope it shows in the picture.


      Crepe flower rosettes:-


                   Cut two strips of 1cm width crepe paper.


                   Accordion fold the strips.


                  Take a circle of paper and spread glue on the edges of the circle and stick the strip slowly gathering the folds as you glue all around the circle.


                 Cut off the extra strip of paper and stick the end.


                Apply glue in the center and glue the second strip same way as the first.


               I stuck a big bead in the center.


      Thanks for stopping by, Have a lovely day.

Monday, March 14, 2011

Basic quilled shapes


        My kids have their exams going on and soon it will be vacation time. Every summer , classes are conducted at our local library for school children . This year  classes for quilling is also being planned. I will not be teaching quilling , I have my English class each summer for the past seven years. The girl who has been asked to teach quilling is a fine arts graduate and Akhil's favourite drawing teacher.


    Our co-ordinator asked me to make a quilled card  to show people who come to enroll their kids for summer classes -since most of them have not heard of quilling. She wanted me to give an example of the basic shapes of quilling in my card. I have tried to use all the basic shapes in the flowers and the leaves ,a bud and a fringed flower to show some variations with tight coils.I included quilled letterings also to show how much more can be done with paper strips. It is just lack of further space on the card that stopped me from adding other techniques.


    I like to recycle as much as I can ,I have cut an old wedding card in to strips for the basket. I rolled the strips and pinched them to make identical semi circles and stuck them on the flat side . It had a very rich shimmer on it and using the strips flat gives a nice effect.


      Most of us know how to make a fringed flower , I include these steps for my non blogging friends who like everything to be in my blog.

    To make the fringed flower- take a strip of half inch width and cut fringes with a scissor as shown . Stick a  5mm width strip to the fringed strip .(click on image to enlarge)

       Roll the strips using a  slotted tool starting with the 5mm strip and make a tight coil.Continue rolling the fringed strip over the tight coil.


      Stick the end of the strip .

       Press the fringes on all sides with your fingers ,here's a beautiful fringed flower with a tight coil center.

        The news of the devastating earthquake and Tsunami in Japan brings very sad memories of the agony which lot of people in Tamil Nadu went through not many years ago. I end this post with thoughts and prayers to the people of Japan in these difficult times.

Wednesday, February 23, 2011

Red Roses


           I love making paper flowers and roses are my favourite. I  made these roses with red colour half inch strips.


        The paper for the background is from my handmade paper pack. I liked the texture of the paper  and roses was the first thing that came to my mind. As I finished this card , I was surprised I haven't filled up the entire card like I am used to . I liked this arrangement of roses and  with this background I felt it best to keep it simple and with some difficulty I avoided scrolls .


        For each flower cut a half inch wide strip in to quadrilaterals as shown.
Ten petals make a flower.


      Take one piece of paper and cut on the narrow side of the quadrilateral as shown .


         Curl the sides of the larger side on both ends with a needle.


          Apply little glue on one half of the slit end.


         Overlap and stick the slit ends one on top of the other .You have one petal.


         Take a small circle  of paper and stick the petal as shown


       Stick five petals to form the outer circle of the petals.


       Next stick the other five petal inside (or even four if you don't want it to be too crowded) and then roll a loose coil of the same colour with 5mm paper strip and stick it to the center of the rose. 


      Thanks for stopping by, have a creative day.

Saturday, November 27, 2010

Another quilling idea


    I think the petals of the flower look like they are embroidered. I saw a picture of flowers in google images which looked like paper embroidery and attempted to reproduce the same effect , I Pinched my  coils in every imaginable way and only ended up disappointed. It so happens that there is a method to how we can get the effect. I chanced upon the tutorial at Alli's blog


    The wings of the dragon fly I made using wheatear technique. I added the dragon fly just to show the similarity in making the petals and the wings.


Wheatear method for the wings.


    For the four wings take four strips and make folds in them as shown. Starting  with one centimeter fold the strips increasing by a centimeter for each fold. Up to seven centimeters.(Six for the smaller two wings)


     Take one strip and make a loop as shown starting with the one centimeter length .


       Then fold the two centimeter length fold over the first one and form a loop and then the three centimeter so on.


         Once you finish looping the whole strip stick the end .(six loops for the smaller wings and seven for the larger).


Now apply glue at the folds so that the loops stay in place. That will make one wing of the dragonfly.


       The petals are also made in a similar way, first make a small loop , 


        Loop the strip around the first loop to form more loops each time folding the strip on one side where you are holding( just like wheatears). Be sure to hold all the loops together.


     Once you have finished looping the entire strip ,stick the end of the strip .Don't let go of the coils.


       Flatten the loops by nicely pressing on the side away from your hand,still holding the folds firmly.You can shape the petal a bit.


      Now let go of all the folds that your were holding.You have a beautiful petal. This method  also has a name it is called a vortex.Both the flowers are made using this method and without any quilling tool.


     I think it is beautiful , while I was finishing one flower  this way, it occurred to me that the loops look more like eccentric loops . As a trial I did this flower by first rolling the strip with my needle to make a loose coil . I pulled all the strips to one end and then pinched it and held it firmly after that I pressed the other side flat and then released the coils. And this is the result. 


Thanks for stopping by, Have a great day.